

If you’re craving a dessert that’s sweet, tangy, and refreshing, Key Lime Pie Bars are exactly what you need. These delightful treats are a twist on the classic key lime pie, but in a convenient bar form that’s perfect for sharing. With their buttery graham cracker crust and creamy, zesty filling, Key Lime Pie Bars are the ultimate summer dessert that brings a burst of citrus flavor in every bite.
What makes Key Lime Pie Bars so popular? For one, they’re incredibly easy to make. Unlike a traditional pie, you don’t need a pie dish or fussy toppings. A simple press-in crust, a smooth lime filling, and a quick bake are all it takes to create these irresistible dessert bars. Plus, they’re perfect for parties, picnics, or just a sweet treat at home.
Not only are Key Lime Pie Bars simple and satisfying, but they’re also highly customizable. You can adjust the sweetness, swap out ingredients to fit your dietary needs, or even add fun toppings like whipped cream or toasted coconut. Whether you’re baking for a crowd or treating yourself, these bars are sure to impress.
Looking for more citrusy treats? Check out our refreshing Lemon Pancakes with Blueberry Maple Syrup for a breakfast twist on zesty flavors.
Table of Contents
What Are Key Lime Pie Bars? – A Zesty Twist on a Classic Dessert
History of Key Lime Pie and Its Bar Version
The origins of key lime pie trace back to the Florida Keys, where the tiny, aromatic key lime became the star of this iconic dessert. Traditionally, the pie features a smooth, tangy filling made with key lime juice, sweetened condensed milk, and egg yolks, all nestled in a graham cracker crust. Over time, bakers realized they could adapt this creamy, citrusy delight into easy-to-share bars.
Key Lime Pie Bars offer the same luscious flavor and velvety texture as the classic pie but in a more portable, bite-sized form. Perfect for potlucks, parties, or simply snacking, these bars deliver bold flavor without the need for a fork and plate.
Why Key Lime Pie Bars Are a Must-Try Treat
So, why should you choose key lime pie bars over the traditional pie? First, they’re quicker and easier to assemble. No fancy pie dish or delicate meringue topping needed. Just press the crust into a baking pan, pour the filling, bake, chill, and slice.
Second, their portion-friendly squares make them perfect for sharing. Whether it’s a summer BBQ or a holiday dessert platter, these bars fit right in.
Lastly, they’re versatile. You can tweak sweetness, swap ingredients for dietary needs, and even get creative with toppings like whipped cream, coconut flakes, or white chocolate drizzle.
Print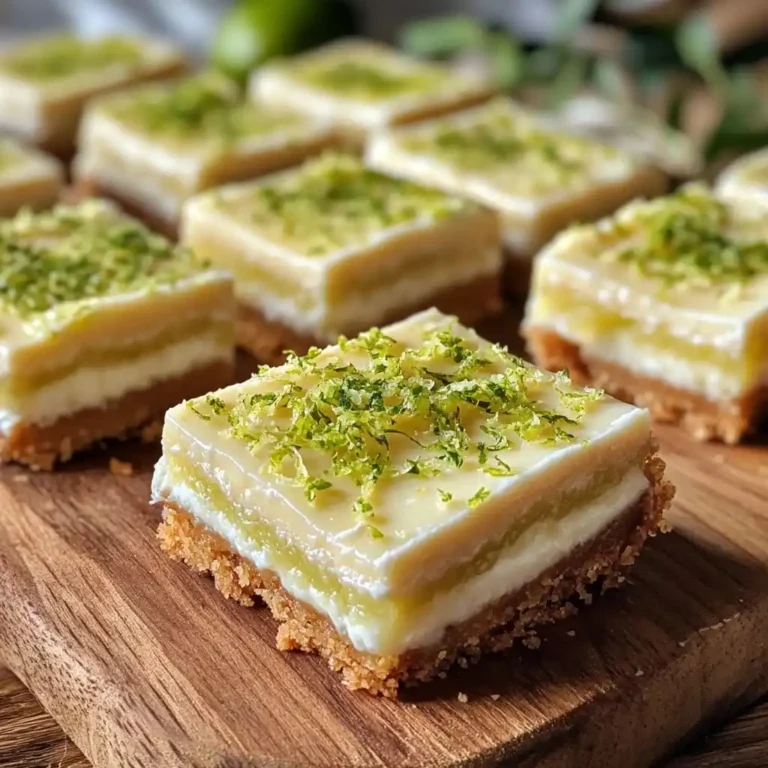
Key Lime Pie Bars
Sweet, tangy, and refreshing, Key Lime Pie Bars bring the classic pie flavors into a convenient, shareable bar form with a buttery graham cracker crust and creamy citrus filling.
- Total Time: 35 minutes (plus chilling)
- Yield: 16 bars 1x
Ingredients
1 ½ cups graham cracker crumbs
⅓ cup granulated sugar
6 tablespoons unsalted butter, melted
Pinch of sea salt (optional)
1 can (14 oz) sweetened condensed milk
4 large egg yolks
½ cup fresh key lime juice (or ¾ cup Persian lime juice + ¼ cup lemon juice)
1 tablespoon key lime zest
Optional toppings: whipped cream, extra lime zest, toasted coconut, powdered sugar
Instructions
Preheat oven to 350°F (175°C) and line an 8×8 or 9×9 inch pan with parchment paper.
Combine graham cracker crumbs, sugar, melted butter, and salt. Mix until it resembles wet sand.
Press crust mixture firmly into the pan and bake for 10 minutes until lightly golden.
In a bowl, whisk egg yolks until slightly thickened and pale yellow.
Add sweetened condensed milk and mix until smooth.
Whisk in key lime juice and zest gradually until fully incorporated.
Pour filling over the baked crust and smooth out the top.
Bake for 15-20 minutes, until edges are set and center jiggles slightly.
Cool to room temperature, then refrigerate for at least 2 hours or overnight.
Slice with a hot, clean knife for perfect squares.
Top with whipped cream, extra zest, or toasted coconut if desired.
Notes
For a dairy-free version, substitute coconut condensed milk and use cornstarch mixed with coconut cream instead of eggs. Always prebake the crust to keep it crisp.
- Prep Time: 15 minutes
- Cook Time: 20 minutes
- Category: Dessert
- Method: Baked
- Cuisine: American
Nutrition
- Serving Size: 1 bar
- Calories: 210
- Sugar: 18g
- Sodium: 120mg
- Fat: 10g
- Saturated Fat: 6g
- Unsaturated Fat: 3g
- Trans Fat: 0g
- Carbohydrates: 25g
- Fiber: 1g
- Protein: 3g
- Cholesterol: 55mg
Keywords: key lime, pie bars, citrus dessert, summer dessert, easy baking, tangy sweets
Key Ingredients for Authentic Key Lime Pie Bars
Choosing Between Key Limes and Regular Limes
The star of Key Lime Pie Bars is, without a doubt, the key lime itself. Known for its bold, tart flavor and unique aroma, key limes are smaller and more fragrant than the standard Persian limes you find in most grocery stores. They bring an intense citrus punch that’s both tangy and slightly floral, giving these bars their signature taste.
But what if you can’t find key limes? No worries. You can absolutely use regular limes as a substitute. While the flavor profile is slightly different—Persian limes are less tangy and more subtle—you can mimic the brightness by adding a bit of fresh lemon juice to balance the flavors. For every cup of lime juice, use ¾ cup Persian lime juice and ¼ cup lemon juice to get closer to that authentic key lime zing.
Freshly squeezed juice is always best, but bottled key lime juice can be a lifesaver when fresh limes are out of season. Just make sure to use a high-quality brand without added sugars or preservatives.
Essential Components: Crust, Filling, and Toppings
Every great batch of Key Lime Pie Bars comes down to three essential components: a buttery crust, a creamy filling, and optional but delicious toppings.
1. Graham Cracker Crust:
The foundation of these bars is a simple graham cracker crust. You’ll need crushed graham crackers, melted butter, and a touch of sugar. This combo creates a sweet, crunchy base that perfectly complements the tart lime filling. For an extra twist, you can mix in crushed vanilla wafers or a pinch of sea salt to balance the sweetness.

2. Creamy Lime Filling:
The heart of Key Lime Pie Bars is the luscious, zesty filling. The classic recipe calls for key lime juice, sweetened condensed milk, and egg yolks. The condensed milk adds richness and sweetness, while the egg yolks give the filling its silky texture. For a lighter version, you can experiment with Greek yogurt or coconut cream.
3. Toppings (Optional but Recommended):
While traditional key lime pie might feature a meringue topping, bars often go simpler. A dollop of freshly whipped cream, a sprinkle of lime zest, or even a dusting of powdered sugar can elevate both the flavor and presentation. Feeling fancy? Try adding toasted coconut flakes or a light white chocolate drizzle for a tropical vibe.
Discover how tropical ingredients shine in desserts with this Mexican Street Corn Pasta Salad—perfect for summer feasts alongside your Key Lime Pie Bars.
Step-by-Step Recipe for Perfect Key Lime Pie Bars
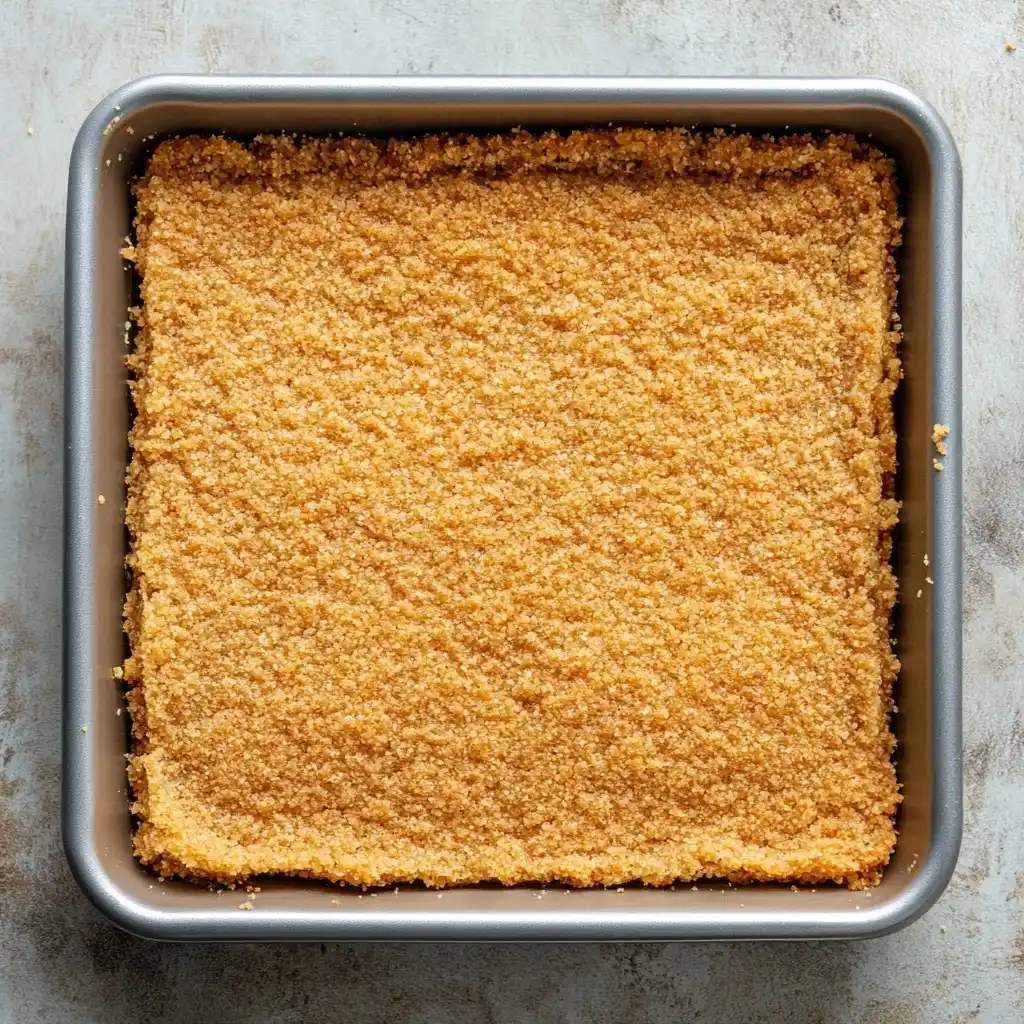
How to Make a Buttery Graham Cracker Crust
The foundation of irresistible Key Lime Pie Bars is a perfectly crisp and buttery graham cracker crust. Here’s how to nail it every single time:
Ingredients for the Crust:
- 1 ½ cups graham cracker crumbs
- ⅓ cup granulated sugar
- 6 tablespoons unsalted butter, melted
- Pinch of sea salt (optional but recommended for balance)
Instructions:
- Prepare Your Pan: Line an 8×8 or 9×9-inch baking pan with parchment paper, leaving some overhang for easy removal later.
- Mix the Crust: In a bowl, combine graham cracker crumbs, sugar, melted butter, and a pinch of salt. Stir until the mixture resembles wet sand and holds together when pressed.
- Press and Bake: Firmly press the mixture into the bottom of your pan, making sure it’s packed evenly. Bake at 350°F (175°C) for 10 minutes until lightly golden. This pre-bake step ensures the crust stays crisp after adding the filling.
Preparing the Creamy Key Lime Filling the Right Way
Now comes the heart of your Key Lime Pie Bars—the creamy, tangy filling. This part is all about balance: rich, smooth, and bursting with that signature citrus zing.
Ingredients for the Filling:
- 1 can (14 oz) sweetened condensed milk
- 4 large egg yolks
- ½ cup fresh key lime juice (or substitute as mentioned in Part 2)
- 1 tablespoon lime zest (for extra punch)
Want a fun no-bake dessert alternative? Try our No-Bake Fireworks Oreo Cheesecake Bars for another crowd-pleaser.
Instructions:
- Whisk the Yolks: In a medium bowl, whisk the egg yolks until they thicken slightly and turn pale yellow.
- Add Condensed Milk: Slowly whisk in the sweetened condensed milk until fully incorporated and smooth.
- Mix in Lime Juice and Zest: Gradually add the key lime juice and zest, whisking constantly. The acidity will slightly thicken the mixture—this is what gives your bars their silky texture.
- Pour and Bake: Pour the filling over your pre-baked crust. Smooth out the top with a spatula. Bake at 350°F (175°C) for 15-20 minutes, or until the filling is set but still jiggles slightly in the center.
Baking Tips: How to Know When Your Key Lime Pie Bars Are Done
Visual and Texture Cues for Perfect Doneness
One of the trickiest parts of baking Key Lime Pie Bars is knowing exactly when they’re done. Overbake them, and you risk cracks and a rubbery texture. Underbake, and they won’t set properly. Here’s how to nail it:
- Slight Jiggle Test: When you gently shake the pan, the center of your bars should jiggle slightly, like set Jell-O, while the edges stay firm. This indicates the filling is set but still creamy.
- Surface Appearance: The top should look slightly glossy and smooth without browning. A matte finish means they’re overbaked.
- Touch Test: Gently tap the surface with your finger—it should feel soft but not sticky or wet.
Baking times can vary, so start checking around the 15-minute mark. Depending on your oven, it might take up to 20 minutes for perfect results.
Common Baking Mistakes to Avoid
To keep your Key Lime Pie Bars flawless, steer clear of these common pitfalls:
- Skipping Prebake on the Crust: This can cause a soggy bottom. Always prebake your crust.
- Overmixing the Filling: Gentle whisking is key. Overmixing incorporates too much air, leading to cracks.
- Not Cooling Properly: Rushing the cooling process can ruin the texture. Always let the bars cool completely before refrigerating.
Master oven-baked perfection with this guide on How Long to Bake Salmon at 400°F—the same precision helps with baking desserts like Key Lime Pie Bars.
Customizing Key Lime Pie Bars: Sweetness, Texture, and Dietary Swaps
Adjusting Sweetness Levels Without Sacrificing Flavor
Everyone has a different sweet tooth. Luckily, Key Lime Pie Bars are easy to tweak. If you prefer a tarter dessert, reduce the sweetened condensed milk slightly and add a splash of plain Greek yogurt for balance. For those who like it sweeter, a drizzle of honey or a dusting of powdered sugar on top can do wonders.
Another trick? Use a graham cracker crust with less added sugar, especially if your filling leans sweet. This contrast keeps the flavors balanced and refreshing.
Egg-Free and Dairy-Free Substitutes for a Healthier Twist
Whether you have dietary restrictions or are looking for a lighter version, you can easily adapt Key Lime Pie Bars with simple swaps:
- Egg-Free Alternative: Replace egg yolks with a mix of cornstarch and coconut cream. Use 2 tablespoons of cornstarch whisked into 1 cup of coconut cream for every 4 yolks.
- Dairy-Free Filling: Swap sweetened condensed milk with coconut condensed milk or a blend of silken tofu and agave syrup.
- Gluten-Free Crust: Use gluten-free graham crackers or almond flour as a crust base.
These adjustments retain the creamy, tangy goodness while making your Key Lime Pie Bars more inclusive.
Get creative with flavors and explore patriotic sweets like the Firecracker Red White and Blue Cake for your summer gatherings.
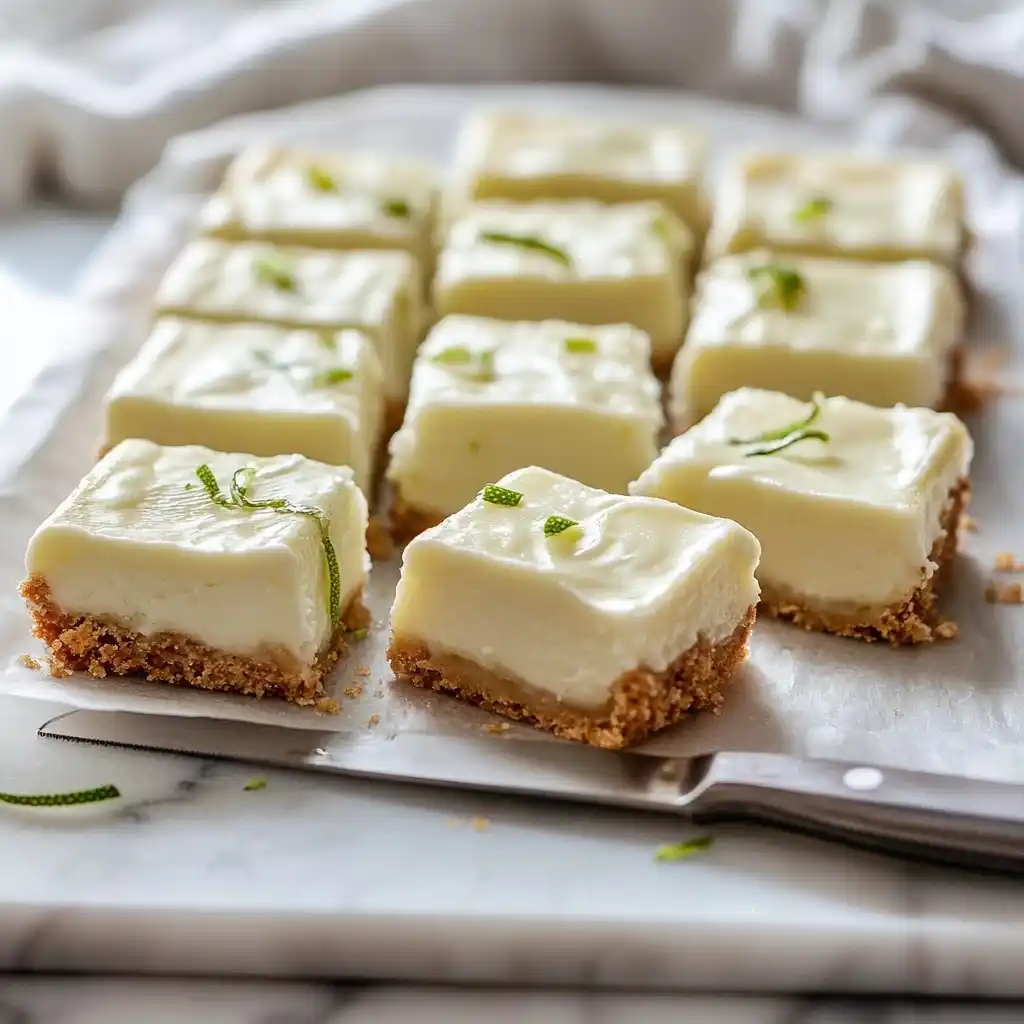
Cutting and Serving: Pro Tips for Clean, Picture-Perfect Slices
How to Chill and Slice Bars Without Cracking or Crumbling
So you’ve baked the perfect Key Lime Pie Bars—now it’s time to slice them cleanly without making a mess. Here’s how:
- Chill Thoroughly: Refrigerate your Key Lime Pie Bars for at least 2 hours, preferably overnight. Cold bars are firmer and slice much cleaner.
- Use a Hot Knife: Dip a sharp knife in hot water, wipe it dry, then make your slice. Repeat between each cut to avoid smearing the filling.
- Lift with Parchment: Use the parchment paper overhang to lift the entire slab out of the pan before cutting. This gives you better control and cleaner edges.
- Wipe After Each Cut: A clean knife equals clean bars. Don’t skip this simple but crucial step.
Presentation Ideas for Parties and Gatherings
When serving Key Lime Pie Bars for parties or events, presentation matters. Here are a few easy ways to impress:
- Top with Lime Zest: A sprinkle of fresh lime zest adds color and extra citrus aroma.
- Whipped Cream Dollops: Pipe small rosettes of whipped cream on each bar for an elegant touch.
- Add Texture: Sprinkle crushed graham crackers or toasted coconut on top for added crunch.
- Individual Wrappers: For grab-and-go events, wrap each bar in wax paper or serve in mini cupcake liners.
For elegant presentations, see how we styled these Patriotic Oreo Balls—great serving inspiration for your dessert bars.
Storing and Freezing Key Lime Pie Bars for Maximum Freshness
Best Practices for Refrigerating Leftovers
Proper storage keeps your Key Lime Pie Bars tasting as fresh as the day you made them. For short-term storage:
- Airtight Container: Place the bars in a single layer in an airtight container to prevent absorbing fridge odors.
- Separate with Parchment: If stacking is necessary, place parchment paper between layers to avoid sticking.
- Refrigeration Time: Bars stay fresh for up to 5 days in the refrigerator.
How to Properly Freeze and Thaw Key Lime Pie Bars
Need to prep ahead? Key Lime Pie Bars freeze beautifully with the right technique:
- Pre-Freeze First: Arrange the bars on a baking sheet lined with parchment and freeze until solid (about 1 hour).
- Wrap Individually: Once frozen, wrap each bar tightly in plastic wrap, then foil, to prevent freezer burn.
- Store in Freezer Bags: Place wrapped bars in a resealable freezer bag and label with the date.
- Freeze Time: Bars can be stored for up to 2 months.
- Thawing: Transfer bars to the fridge to thaw overnight. Avoid microwaving, which can ruin the texture.
Need freezer-friendly ideas? Our Easy Ground Beef Recipe shares great tips on make-ahead meals and storage hacks.
Make-Ahead Instructions: Simplifying Dessert Prep for Events
Timing Tips: How Far in Advance Can You Make Key Lime Pie Bars?
Planning a party or holiday gathering? The good news is Key Lime Pie Bars are the ultimate make-ahead dessert. Here’s how to plan your prep:
- Best Make-Ahead Window: Bake your bars up to 2 days in advance. This actually improves their flavor as the lime filling firms up and the crust melds with the creamy layer.
- Overnight Chill Is Key: Always let the bars chill overnight for best results. This ensures a firm texture and easier slicing.
- Avoid Toppings Too Early: Hold off on adding whipped cream, zest, or other toppings until right before serving to keep them fresh and vibrant.
Storage Solutions to Maintain Texture and Flavor
To keep your Key Lime Pie Bars tasting bakery-fresh:
- Store them in an airtight container in the fridge.
- If stacking, use parchment paper between layers.
- For outdoor events, keep bars in a cooler with ice packs to prevent softening.
Troubleshooting: Avoiding Cracks, Sogginess, and Common Failures
Why Do Key Lime Pie Bars Crack and How to Prevent It
Cracks can happen if your bars are overbaked or if the filling was overmixed. Here’s how to prevent them:
- Don’t Overbake: Remember, a slight jiggle in the center means they’re done.
- Gentle Mixing: Whisk slowly to avoid adding air bubbles that lead to cracks.
- Gradual Cooling: Let bars cool at room temperature before refrigerating. Sudden temperature changes can cause cracks.
Fixing Soggy Crusts and Runny Fillings
Nothing ruins Key Lime Pie Bars like a soggy crust or a runny filling. Avoid these issues by:
- Prebaking the Crust: Always bake the crust before adding filling to lock in crispness.
- Proper Ratios: Stick to the right balance of juice and condensed milk for a firm set.
- Refrigerate Fully: Bars need at least 2 hours (overnight is better) to firm up.
FAQs About Key Lime Pie Bars
Can I Use Regular Limes Instead of Key Limes?
Yes! Regular limes can be used if key limes are unavailable. For a closer flavor match, mix in a bit of lemon juice for extra tartness.
How Do I Know When the Bars Are Done Baking?
When the edges are set and the center jiggles slightly but isn’t liquid, your Key Lime Pie Bars are ready.
Can I Make These Bars Ahead of Time?
Absolutely. Make them up to 2 days in advance and chill until serving.
How Should I Store Leftover Bars?
Store leftovers in an airtight container in the fridge for up to 5 days. Separate layers with parchment if stacking.
Can I Freeze Key Lime Pie Bars?
Yes, they freeze well. Wrap each bar individually and store for up to 2 months. Thaw in the fridge before serving.
How Can I Achieve Clean Slices?
Chill the bars thoroughly and use a hot, clean knife for each cut.
Can I Adjust the Sweetness of the Filling?
You can reduce condensed milk slightly or add Greek yogurt for a tarter filling. Adjust sweetness to taste.
What Can I Use Instead of Egg Yolks?
Use a mixture of cornstarch and coconut cream as an egg-free alternative for a creamy texture.
Can I Use a Regular Key Lime Pie Recipe to Make Bars?
Yes, but you may need to adjust baking time and crust thickness for the bar format.
How Do I Prevent the Bars from Cracking?
Avoid overbaking, whisk filling gently, and cool bars gradually to prevent cracks. l
For more recipe inspiration and visual guides, check out our curated boards on Pinterest.